Friday, February 25, 2011

Gettin' primed and ready!

We've been looking at alot of these lately...because it is almost time to PAINT the basement!! I know right...I'm kinda dying over here!!The exact colors will remain a mystery...unless you have been to my house in the past week, then you will have a good idea of what we are going with...although Husby has decided that now he is worried about some of our my bold color choices...*sigh*

(...and the lighting in this picture does these colors no justice at all...so stop gagging on the dirty mustard color to the left...I can hear you all the way over here. I haven't completely lost my mind.)

The basement as been completely drywalled and sanded...drywall guy has been paid...and we are ready for paint!

Wanna see?

Of course you do...and I know some of you are saying, "Wait! I thought it was going to be a secret?!" Well, that was our intention...errr well Husby's intention...but he has loosened the reigns and I am free to share photos!

yahoooo!

Before I show you...allow me to boggle your mind with how far we have come...(now, these are the original before's...but they are "before" enough to serve my point today.)

Remember, this is the original basic layout (computer renderings) of the basement...some things have changed...i.e. the Snack Bar area.


So, without further adieu...our new basement with legit photos...(more before and afters coming soon!)
 
This is just right of the bottom of the stairs...basically standing where our office desk will go...looking into the Game Room. The Pantry is in that room to the left. The far closet on the right holds utilities like BGE meter and sump pump. The Closer closet to the far right is storage and electronics (for TV).


Please note each corner, besides doors and windows is a rounded bullnose corner...I am in love with them!


This was our view about 6 months ago, basically looking towards that far wall between the left wall and the first coloumn...


And here's another before...kinda...in this picture you are actually in the Game room standing by the pantry door and looking towards the closet areas...


In comparison to original rendering...not too bad!


This view is standing in the Snack Bar/Bathroom hall area facing the TV wall...where we will put our new 55" LED HDTV....booyaaahhh!
The Office will go to the right...


Snack bar area...


Which will look something like this...colors and arrangement may change, but will include cabinets and a mini-fridge.


Here, you are looking into my Studio here. The set up has been arranged in my head about 80 different ways...I think I am just going to have to wait for furniture to really lay it all out. More than likely though, you are looking at the Photo Nook, where I will house my backdrops, etc.


This is pretty much the same view from before...


This is the left side of the same room above.
My TV will sit up in that top left hand corner (where the blue tape is).
 

Isn't it GREAT?!?!! We are just too excited. Next is paint, then flooring...if all goes well...we may have a complete basement by...June?! That's my hope at least!!

We'll share more soon!!

Thursday, February 24, 2011

Ana-White.com...how I love thee!

Quite simply.

I lurve Ana White.

She has SO many amazing designs on her Blog and she makes each and everyone look so...darn...easy.

Here are some of my favorites...i.e. ones I totally wanna make!

Rolling cubbies...between $20-$50...


The High Rise Shelf...for under $20...


The 5 Shelf...for under $20...


A Leaning Wall Shelf...for between $20-$50...


Truss Shelves...between $20-$50...


Aren't these great?! I can't wait to try some (or all) of them! I have been following her site for a while...after finding $10 shelves there. These puppies are going in my dining room...eventually!


I visited Ana's site today in hopes that she had a tutorial for making a chair similar to these (from Target).


I want some SO badly, but I do NOT like the $299+ price tag!! They can't be THAT hard to make right?!?! Well...I'll add it to the list...and until then...I'll practice my hand at furniture making thanks to Ana-White.com! :)

Interchangable Zipper Necklace

So, I have ONE more thing I can mark off my 30 Before 30 List! :)

I made my own necklace using this tutorial from Craftaholics Anonymous.


I didn't quite get all the pieces that I wanted for the project, but I like the way it turned out! Here's a few pics of how I did the project...first off, I didn't buy a premade necklace, although you can and then use the existing lobster clips to attach to the zipper base...I made my own necklace out of flat round mother of pearl beads.

First I drilled tiny holes in each of the beads...


Then I checked to make sure my rings fit...and they did...


Finished drilling all the holes...


Then I used my eyelet punch to make holes in the zipper ends...


Then I hammered in my eyelets. I used silver eyelets so they would show up a little better!


Then I just attached my rings and my new necklace with lobster clips.

I think it's super cute!


On to the next project!! :)
Pin It

Tuesday, February 22, 2011

I lurve my momma.

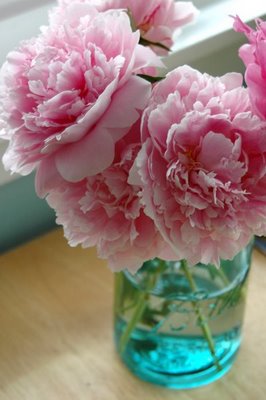
...because while she was away on a Minister's Retreat 'down the ocean hon...she stopped in a local antique shop and picked up some of these beautiful blue Ball Mason jars that I had been looking for...


She got me 4 of the jars and one small clear apothecary jar for my bathroom. I am so excited.

I can put my Lilacs, Peonies and Hydrangeas in them like this...


Then I can decorate like this...


I'm kinda dying over here...

Skoy Cloth Giveaway Winners!

Better late than never...here are the 2 winners of the Skoy Cloth giveaway!


Brittany at MyLifeinManyTitles and Stephanie from MyDailySprinkle!!!

Congrats ladies, I will have your Skoy's to you ASAP! :) Thanks for all who entered!

Saturday, February 19, 2011

Recovering a Chair - A new wardrobe for my seat :)

Another thing I can mark off my 30 Before 30 List! Wahoooo! I mentioned yesterday that I finally finished painting my chair and bench for my recovering project.

Here is the final result!


Back in October I picked up this chair at Goodwill for $25 with Mom. I was pumped to recover it and use it in my Studio and for Photoshoots. I got him home and got all the fabric ripped off with Husby's help...


Once I got all the icky, nasty, old fabric off we headed outside to lightly sand and hit it with some white spray paint...


I brought it inside and tried my hand at some antiquing glaze...it did not go so well...so I nixed that idea!


And then...we had to do more work on the basement and my project got put on hold...straight through Christmas and New Years. I finally decided it was time to finish the project. It needed another coat of white paint after my antiquing debacle, and I decided to finish it off with a glossy coat.

Once it dried of course, now it was time to add my fabric and padding. I traced out the front piece using the cardboard from the original padding.


I used the same cardboard to wrap my fabric on for the back of the chair, then stapled it into place.


Then I added some extra padding between the back and the front and started stapling my front piece into place.


Wahh-laaaa. All done!
Well, at least the seat back portion!


Now for the seat itself. I decided I wanted some extra padding to go all the way down the front for those of us that are shot and didn't want to rest our legs against wood.


Once I cut the padding into place (which wasn't much cutting) then I covered it with my fabric and started pulling, tucking and stapling. It was alot easier than I thought it would be!


Finally...here I was at the last step. Time to add the trim.


Perfect! It makes it all come together!


Here is a close up of the trip. Crisp black. :)


And here is what the back looks like. There are a few paint chips that I will have to fix, but that's what happens when you give me an industrial stapler and a hammer.  :) Trust me...I have a few sore fingers that remember too.


And here she sits in her temporary home. Until the Studio is complete!


The two front legs were my only real trouble spots. And I tried my best with them. I even added some fabric brads to cover up all the tucking I had to do. It's not bad I guess.


And finally...the Before and After again...


I LOVE it...and I can't wait to use it!!
Pin It
Related Posts with Thumbnails