I would say this post is more for my benefit...but I have been doing alot of reading lately on digital photography. Not so much point and shoot, but using a DSLR camera. (Digital Single Lens Reflex) All in all it pretty much means you are in control of the shutter speed, the aperture, the ISO...in order to take better pictures.
I haven't taken any formal classes, which I would really love to...however...I need a DSLR to work with. I have my eye on one. It's the Canon EOS Digital Rebel T1i. She's top-of-the-line for what I am looking for...but I need to save some moola for her! I keep trying to convince Husby to let me have a portion of the tax refund for her, but ehhh, not too sure how that's gonna work out. :P
So, in the meantime, I will continue to learn as much as I can, because one day, I will own her! Husby is going to laugh his face off at this one...(since he thinks of me as such the entrepreneur!!!)...but I would really love to do photography for some extra $ on the side. I already love taking pictures of friends and family and their babies. I would love to take pet pictures as well! But anywho...I still got some learnin'-to-do!
So, journey along with me in a typical day of learning!
In the beginning, here are some important things to know:
- Don't throw away your camera manual...it should become your new best friend.
- Learn to use all of your SLR's camera functions, like ISO, Aperture and Shutter Speed. (more on those soon.)
- Some important additional pieces of equipment are a sturdy tripod and remote release. (important in taking pictures that require a longer shutter speed.)
- If you are finding that your pictures are blurry, change to a faster shutter speed.
- Learn through experimentation.
- The letters ISO refer to the film speed.
- ISO determines how sensitive the image sensor is to light.
- The most common ISO settings are 100, 200, 400 and 800.
- Depending on your camera model, the range can be between 64 and 1600. (the camera I want has a "Wide range ISO setting 100-3200 with ISO expansion: 6400, 12800"...freaking sweet!)
- The lower the ISO number, the slower the speed. The higher the ISO number, the faster the speed.
- Use an ISO of 100 or 200 when taking photographs outside in sunny conditions.
- If the sky is overcast or it is evening time, then use an ISO within the range of 400 to 800.
- Night time or in cases of low light you might need to set your digital camera ISO to 1600. If you don't then your photo will appear too dark if at all.
Now. What about Aperture: (taken from slrphotographyguide.com)
For photographers who use SLR cameras, AV (Canon) or A (Nikon) mode determines whether all the photograph is in focus or part of. For example photographers can choose to have a sharp foreground and background, or they can blur the background.
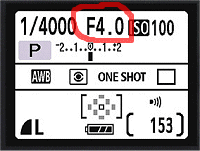
On SLR digital cameras, aperture is indicated by a f-number value.
 The higher the F number, the more of the photo that will be in focus. For instance if you're taking a photograph of a landscape, chances are you will want all of the foreground and background to be sharp and in focus. For this to happen you will need to set your digital camera f value or aperture as its known, to a large number, for example F/11.
On the other hand if you're taking a photograph of a bird and you want the animal in focus but not the background, then you would choose a small F number like F/4.
When the f number is small, the lens diaphragm is actually wide open. So if someone says to you that you need to open your lens more, they mean to lower the aperture or F number. Alternatively, if the aperture is a large number, say F22 then the lens diaphragm is smaller or more closed. This often causes much confusion with beginners.
- Opening your lens more refers to lowering the f number.
- Closing your lens more refers to a higher f number.
Shutter speed is described as being the amount of time a digital cameras shutter is held open for when taking a photograph. Shutter speed allows light to reach the cameras image sensor.

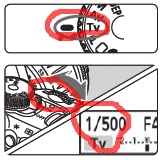
To set your digital camera on shutter priority, turn your mode dial to TV like the image on the right. In case your wondering, TV stands for time value. Now rotate the main dial until you have the shutter speed your after.
Shutter speed is measured in seconds and looks like 1/500, 1/250, 1/2 or 1 as in one second etc. It can range anywhere from 1/8000 to B for bulb. Bulb keeps the shutter open for as long as the shutter button is pressed down.
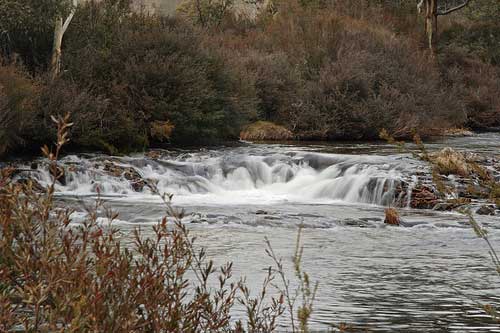
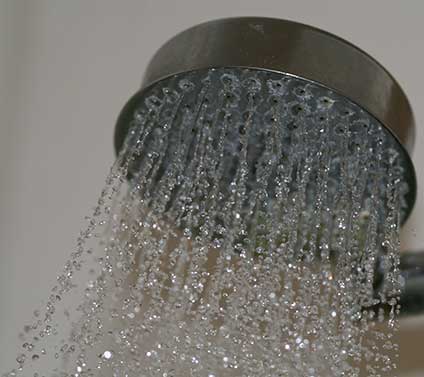
The shutter speed you will need to use depends on the type of photograph you want to take. For example, if you want to take a photograph of water frozen in action with every little bead in focus, then you would choose a fast shutter speed like 1/500 of a second. If you want to blur running water like the example below, then you would need to use a slower shutter speed like 1/4 of a second. Often when you use a slow shutter speed, you will also need a tripod to help avoid camera shake.

The photograph of blurred water shown above was taken with a shutter speed of 0.25 sec (1/4). At this speed I was lucky enough to hand hold the digital camera steady to avoid having to use a tripod.
Now in contrast, here is a photograph of water taken with a faster shutter speed of 1/60 sec so every bead of water can be seen.

Night photography also requires a slow shutter speed. Once again, this allows enough time for light to reach the cameras image sensor. Otherwise your image might turn out nothing other than a black rectangle or a series of colorful circles. Here's a neat tutorial on taking pictures of light trails.
So here's a recap of shutter speed:
- Slow shutter speed, slows motion.
- Fast shutter speed, takes the image almost instantly as in frozen in time.
- Use slow shutter speeds of at least 10 seconds or more for night shots of cities, buildings and streets etc.
- When using a slow shutter speed it's also a good idea to use a tripod and remote shutter release to avoid camera shake.
- If for any reason you don't want to use a tripod, then a general rule to avoid camera shake is to never set your shutter speed slower than the reciprocal of the focal length value. For example, if your lens focal length is set at 50mm then don't use a shutter speed any slower than 1/60th of a second and so forth.
- To photograph a running child or animal while blurring the background, set the shutter speed to between 1/40 sec and 1/125 sec. Then follow the running child or moving animal as you press the shutter button. This is often referred to as panning.
So do you have a DSLR? Are you self-taught or did you take classes? I am off to look at DSLR pictures and drool over the thought of owning my Canon EOS Rebel T1i one day! :)


No comments:
Post a Comment